Saturday, July 28, 2012

Back to School SALE and Gettin' Crafty

It's hard to believe that some of you have already started your school year!  The rest of us will be joining you in just a few short weeks.  Has anyone had any back to school nightmares yet?  OMG!  I usually get them really bad the entire week before school starts.  I have had dreams that it was open house (orientation) and my classroom was completely bare!!  That's definitely a huge worry of mine!  HA!

To help ease your fears of those back to school nightmares, I have a really awesome Back to School B.O.G.O. sale starting now and running through the end of August.  Click on the picture below to begin shopping! :-)

 When you shop at my Teacher's Notebook store, following your purchase, you get to choose any other item for FREE!!  Now that's a great deal!!!  After your purchase, just send me an email (michelle83mcelhinny@gmail.com) with your FREEBIE selection.  Please be sure to include your Teacher's Notebook user name just in case it's different from your email address. Remember, the free item that you choose must be of equal or lesser value than than the highest priced item of your purchase.  You can make as many purchases as you want in the month of August and you will always get to choose that FREE item!! 


GETTIN' CRAFTY
Well, before I left for vacation I was gettin' a little crafty with this boring directors chair that was sitting in my classroom.  I guess I probably should've been packing but I'm a huge procrastinator.  :-)  Oh well!  Read the rest of this post for a tutorial of how I jazzed up my chair and for how you can get crafty with a chair just like this one.

I use this chair in my classroom for writing celebrations and student sharing.  Students even like to sit in it as a special privilege for silent reading.  You can get a directors chair just like this one at Pier 1.  This is what the chair looked like before I began.   

 The first thing I had to do was pull the boring blue fabric off of the chair.  The fabric on the back of the chair just slides right off when you pull it upwards off of the poles.  The bottom part was a little bit tricky.  Once you take the top part off, the arm rests kinda fall down to the sides.  When the sides are down, it exposes a long piece of wood that is wrapped in the fabric for the seat part of the chair.  I just pulled the fabric up and out towards the middle of the chair and wiggled it until the wood pieces came out.  I removed the wood from the fabric and set them both aside.  

The next step was the fun part!  Spray paint!!   I took the bare wooden chair outside (Gavin and Landen tagged along) and placed it on a piece of cardboard in my driveway.  I kept the arm rest leaned down to the sides so I could get inside the crevices really good.  I sprayed every inch of the wood and the metal pieces with pink spray paint.  (I'm pretty sure you're not supposed to spray paint on metal hinges or screw parts...Oh well...I wanted it all PINK!)  So as I'm spraying, my boys think it's fun to experiment to see if a piece of grass would stick to it if they threw it on my FRESHLY PAINTED CHAIR!!!  Goodness!  Boys will definitely enhance a mother's ability to be patient!  After the chair was completely covered in pink, I just dragged the cardboard and chair into my garage so it could dry over night. 

  I went to a craft store (Hobby Lobby) and got just one yard of polka dot fabric.  When I saw it at the store, I just had to have it!  That was the easy part!  I could probably spend an entire day in this store!!  They just have so many great things that teachers get excited over...like this glitter scrapbook paper!!  Gavin actually spotted it because it was SPARKLING!!  I'm not sure I have a use for this yet, but a super fun must have for the future.  Way to go Gav!
Now on to the hard part...the fabric!  I used a seam ripper to take the stitching out of both pieces of fabric, including all of the edges.  This allowed me to lay the blue fabric completely straight.   Keep in mind the stitch points when the fabric is folded and sewed.  You will need to sew the fabric back together in the exact same spots.

I took the polka dot fabric and wrapped it around the blue fabric so I could get an idea of how much polka dot fabric I needed (it's kinda like wrapping a gift).  You want just enough polka dot fabric on the blue fabric but not too much.  I left about 1/2 inch of polka dot fabric around the edge of the blue fabric.  I put the polka dot fabric on my table face down and placed the blue fabric on top (leaving that 1/2 inch of extra polka dot around the edges).  I took some adhesive spray and sprayed the top of the blue fabric and then I folded the polka dot fabric on top of the blue fabric so the colored part of the polka dots was now on the outside.  You're essentially wrapping the blue fabric with the polka dot fabric, just like you would wrap a gift...only it's a lot thinner.  When you have smoothed the polka dot fabric onto the blue fabric, so there's no bubbles or wrinkles, flip it over.

Next, you'll want to use a regular glue stick on the edges of the blue fabric to get the polka dot fabric to stick to the uncovered blue side.  This will allow you to move things around if necessary without getting too sticky with the spray adhesive.  When the 3 sides are folded down onto the exposed blue fabric, you will then spray this side of the blue fabric and smooth the polka dot fabric from the middle to the edges.  You really don't want the edges of this side to stick just yet.  Once you have the middle smoothed out, spray a little more spray adhesive onto all of the edges and tuck under the fabric edges so the frayed part of the fabric is not exposed.  All of the edges should match up and all of the fabric should be tucked under to create a closed seam.  Set aside and do the same thing to the other piece of blue fabric.

On to the sewing!  After the blue fabric is completely covered with polka dots, you will need to sew around the entire piece of fabric to keep all of the edges tucked under.  Repeat to both pieces of fabric.  Then  you will need to sew the sides back together, just like it was at the beginning.  This is where you want to remember the stitch points where the fabric was folded and sewed.

Once everything is sewed back together, you can now reassemble the chair.  Make sure the paint is dry!  I waited 24 hours.  I cut the extra fabric into strips and tied it in knots around the top of the chair.

Here is the AFTER picture!


Sorry for such an extremely long post, maybe next time I'll try a video!  :-)  I hope this little (it seems harder that it really is) project will inspire you to jazz up your classroom by taking a boring piece of furniture and remodeling it to suit your personality.  A little fabric and a can of spray paint can go a long way to making your classroom visually appealing for your students.  It really was a fun project and it probably only took me a total of 4 hours total to complete this flip.  I look forward to hearing stories of how you get crafty in your classroom.  Leave a comment with your experience. :-)

Tuesday, July 24, 2012

100 Facebook Followers WINNER and Seussy Stripes posters

 It has been quite a journey reaching 100 followers on my TpT store, Blog, and now my Facebook page.  It really means the world to me that I have such wonderful followers!  You all are the reason that I write and create fun things to use in the classroom.  So I just want to say THANK YOU!!!

The last winner of the 100 Followers Giveaway is....drum roll please...ba da ba da ba da ba da 
...Lisa Richling!!

There will be more giveaways coming soon so check back often.  If you haven't signed up for email notifications, you can sign up under the "Follow Me" section to be the first to get Our Sweet Success updates.

Classroom Centers/Stations Posters 
{Seussy Stripes}
 Another request came in for some center posters to go with a Dr. Seuss themed classroom, so I adjusted the background from the center/station posters that I previously posted in polka dots.


The background is from The 3am Teachers Clip Art Collection: It's a Silly World and I thought that it would go well with any Seussy themed classroom or any primary color themed classroom.  The posters come in two different styles depending on your center/station preference.  Click on the pictures below to download the posters.
 
Each download contains 43 different center/station signs for you to choose from:
Graphing
 Math Games
Poetry
White Board
Hundreds Chart
Math Literature
Problem Solving
Word Study
Math Fluency
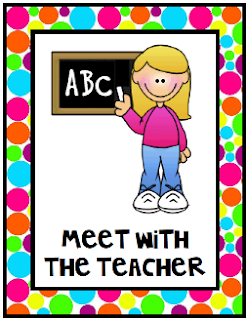
Meet with the Teacher
Writing
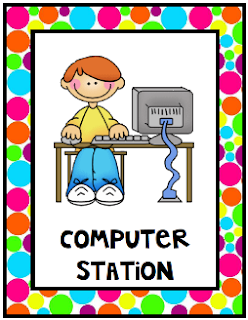
Computer
Listening
Science
Smart Board
Social Studies
Word Work
Read the Room
Write the Room
Letter
Big Book
Pocket Chart
Puppet
Art
Fine Motor
Sewing
Dramatic Play
Sand and Water
Play-Doh
Illustration
Retelling
Manipulatives
Discovery
Lego
ABC
Blocks
Home Living
Literacy Bag
Reading
Buddy Reading
Puzzle
Laptop
Projector 

Both of the downloads include the matching pocket chart cards to go with each of the 43 posters.  Use these to manage your center/station rotations.
  If there are any posters that are not included in this package, please let me know and I can add them for you.  If there is a particular item that you are looking for but cannot find it, please just ask for a custom order.  Get your orders in soon so you have them before school starts.  I can create just about anything that you might need for your classroom in just about any theme that you might be doing.  You can reach me by email at michelle83mcelhinny@gmail.com.


Sunday, July 22, 2012

100 Blog Followers WINNER and Pirate Money

I'm back from vacation and I cannot believe how much I have to do.  I will be a very busy girl the next few weeks before school starts.  While I was away, my little blog finally hit 100 followers! 
The winner of the 100 Blog Followers Giveaway is Susie Q!!
There is going to be one more winner as part of this trio giveaway.  My Facebook page is really close to hitting 100!!  If you would still like to enter to WIN any 5 items from my TpT store, it's not too late.  I will be selecting another winner as soon as we hit 100 Facebook likes.  Just add to the comments by clicking on the link HERE.  Anyone that has already commented will automatically be entered for their chance to win for the last drawings.  Thank you so much for spreading the word about Our Sweet Success!  
 
NEW Pirate Money
 
I had a reader request some pirate money, so here is what I came up with!  
 

 There are two different versions for you to choose from.  Your students will love earning pirate money for showing good behavior, completing their homework, and staying on task throughout the day.  Click HERE to download your Pirate Money!  Have a great day!


Tuesday, July 10, 2012

Vacation Anticipation and More Posters

I can't believe that we are already half way through summer and we only have 47 days left until the first day of school...only 40 more before the first teacher work day.  We will be going on our family vacation this weekend and I am so thrilled!!  I cannot wait to relax on the beach and play in the sand with my boys.  Let me just tell you that they are so excited, FOR REAL!!  Gavin, my 4 year old, asks me every--day, "How many days til the beach!?!"  He's definitely going to be one of those, "Are we there yet!?!" types of kids!! My little Landen is almost 2 and will finally realize what is going on this year...hopefully he will NOT try to eat the sand!! HAHA!! Fingers crossed!!  He eats just about anything!!   

So I don't feel like I'm behind while on vacation, so I can actually relax (I will try to!) and not think about school stuff,  I'm trying to get caught up on my creations before we leave.  As you can tell, I've been focusing mainly on reading resources.  I feel like during the school year I'm geared more toward math resources...maybe it's because of comfort.  Well I have been brainstorming ways to make the lesson planning a little easier and I thought that these posters would help me along the way.  I hope that you can use them as well when planning for fiction and nonfiction comprehension mini lessons.  Click on any of the pictures to download the posters.

Use these Fiction Comprehension Posters when teaching your students about story elements. These bright and colorful posters feature graphics by Thistlegirl Designs and backgrounds by Dreamlike Magic.
 Included in this download are posters for each of the 8 story elements. Each poster contains three questions that students should be able to answer about each part of the story.
Setting
Characters
Major Events
Problem
Solution
Plot
Author's Purpose
Personal Connection 


  Use these Nonfiction Comprehension Posters when teaching your students about nonfiction text features. These bright and colorful posters feature graphics by Thistlegirl Designs and backgrounds by Dreamlike Magic.
 
 Included in this download are posters for each of the 7 nonfiction text features. Each poster contains three questions that students should be able to answer about informational texts.
Topic
Structure
Big Idea
Key Words
Conclusions
Author's Purpose
Personal Connection


 If you need any of these posters custom made or adjusted in any way, I can do that for you to meet your needs.  Just let me know :-)


Sunday, July 8, 2012

Polka Dots Classroom Theme and a Sale

For those of you who liked the polka dot pirate themed classroom but weren't so into the pirates...I have added a polka dots classroom themed packet that has the same content as the polka dot pirate download...I just took out all of the pirates.  I used Thistlegirl kids instead :-)

It is available for you to download HERE. I have also slashed the prices on both of them!! :-)

I am also having a sale in my Teacher's Notebook store this week only.  Check it out for some really great deals.  You won't see 30% off in many stores, but because you are all such wonderful followers...you deserve it.  You can click on the picture below to check out my store!! 

 
100 Followers UPDATE:  

We are getting really close to our next drawing!! :-)  It's so exciting to be SO close!!  If you haven't yet entered the 100 Followers contest, be sure to click HERE to enter.  
Our Sweet Success blog is up to 94 followers...just 6 more!!!  Come on people!! lol  Tell your friends about us!!  Let's try to get this up to 100 by the end of the week.  We will have one more drawing when we get 100 Facebook followers.  You can click HERE to go to the Our Sweet Success Facebook page.  The winner will get to choose any 5 items from my TpT store!!!

Happy Shopping!!!


Saturday, July 7, 2012

Lots of NEW items and REQUESTS

I have been busy, busy, busy creating new things to jazz up my classroom and I hope to share some of that color with your classroom too!  

As I was making the decision to pick up a new graphic designer, I came across these SO SO cute graphics on the Scrappin' Doodles website.  (See the reading posters below)  I instantly fell in LOVE and I just had to have them!!  So, yes...you will be seeing some Scrappin' Doodles in my products in the near future.  I'm not giving up on Thistlegirl Designs, because y'all know I LOVE those graphics too.  I'm just branching out.  :-)

I have used the beanie baby reading strategy posters since my first year of teaching I thought they needed a new update: POLKA DOTS!!  Click on any of the pictures to download the posters.  

These are the reading strategy posters that help students with decoding skills. 

 
This download contains 8 decoding posters:
Stretchy Snake
Chunky Monkey
Lips the Fish
Tryin' Lion
Skippy Frog
Eagle Eye
Flippy Dolphin
Helpful Kangaroo


 I also put a new spin on the comprehension strategy posters...Chevron!!  I made these especially for my bloggy idol...Cara Carroll because I know how much she LOVES some chevron!! These posters will remind students to use their strategies in order to comprehend what they are reading.


I had some requests recently from some very sweet ladies needing some things for their classrooms.  Here are a few of the things that I made especially for them that you could use in your classroom too.  If there's ever a time when you think of something that you wish you had or didn't feel like creating on your own, please feel free to email me!!!  I LOVE to create and I will do you a favor by making those products for you.  

My new friend Amber needed some center signs for her classroom and she loved the new polka dots that I've been using.  So here's what I came up with. 
 This download contains 43 different center/station signs for you to choose from:
Graphing Station
Math Games Station
Poetry Station
White Board Station
Hundreds Chart Station
Math Literature Station
Problem Solving Station
Word Study Station
Math Fluency Station
Meet with the Teacher
Writing Station
Computer Station
Listening Station
Science Station
Smart Board Station
Social Studies Station
Word Work Station
Read the Room Station
Write the Room Station
Letter Station
Big Book Station
Pocket Chart Station
Puppet Station
Art Station
Fine Motor Station
Sewing Station
Dramatic Play Station
Sand and Water Station
Play-Doh Station
Illustration Station
Retelling Station
Manipulatives Station
Discovery Station
Lego Station
ABC Station
Blocks Station
Home Living Station
Literacy Bag Station
Reading Station
Buddy Reading Station
Puzzle Station
Laptop Station
Projector Station

I like to call them stations, but Amber likes to call them centers.  You choose the center/station language and you can download the matching cards HERE for FREE!!


 Here are some of the customized  posters that Amber needed for her classroom.  She chose to call them centers instead of stations and she needed the posters to follow the routine that she already had in place in her classroom.  If you would rather your posters say "centers" instead of stations, click on the pictures below to download.

These are the matching pocket chart cards that you can use to display your center rotations.  Click on the picture to download them for FREE.
 

Another request that I had was from Trish, for more polka dot circle organization labels.  I added numbers and letters to the circle labels that I had in my Polka Dot Pirate Classroom Themed Materials download.  These circle labels do not have any pirates.   
 Included in this download are circle number labels 1-30...
 ...letters A-Z...
 ...and various classroom supply labels.

As with the other downloads, if there is anything missing that you would like to see in the download, please just ask.  I'm always happy to modify my products to meet your needs.  I hope you have some great ideas brewing for the new school year.  I can't put the break on my mind just yet.  One week until vacation and I'm determined to leave all of my school work behind.  Hopefully by then I will feel like I'm ahead of the game before we leave.  
Have a wonderful weekend everyone!!


Monday, July 2, 2012

FACE of a Pirate, Binder Cover, and more Pirate FREEBIES

As you can see, I will be doing a Polka Dot Pirate themed classroom this year.  I have been busy creating all of the things that I will need in the fall.  Here are a few of the items that I have completed so far...there will be more to come, I'm sure!  :-)  Click on any of the pictures to download these FREEBIES.
FACE of a Pirate FREEBIE: This download is modeled after the CAFE literacy menu.  It is 23 page long and contains a FACE of a Pirate menu banner, FACE headers, and FACE strategy cards for you to use when you teach a specific reading skill.
F-Fluency
A-Accuracy
C-Comprehension
E-Expand Vocabulary

This download can be printed and used for an interactive bulletin board for use during guided reading mini lessons and/or silent reading time. Students can select a strategy to work on or you can select it for them. 

FACE of a Pirate is a FREE download that matches the Polka Dot Pirates {Classroom Themed Materials} which you can also download from my store by clicking HERE.

"The Daily 5 and CAFE" are trademark and copy written content of Educational Design, LLC dba The 2 Sisters. Educational Design, LLC dba The 2 Sisters does not authorize or endorse these materials."


 A pirate classroom needs a P.I.R.A.T.E. binder cover.  I have used binders in my classroom for the past six years and it proves to keep my students organized throughout the year.  I actually used Abby Mullins' (Babbling Abby and The Inspired Apple) rock themed binder cover last year and I loved it so much that I created my own pirate themed version that matches the same color scheme.  I like to use address labels on the inside of the covers so students know where to put everything.  Click on the picture to download this FREEBIE.
This FREEBIE is geared toward first grade but can be adjusted if you're planning on using it for a different grade level.  Just email me at michelle83mcelhinny@gmail.com tell me what grade you will be teaching and I will send you the adjusted document.

 On the inner cover, I like to have them store their reading logs for at home reading.  I print these out and glue onto a long sheet of construction paper, then laminate.  Click on the pictures to download these FREEBIES.
I fold the reading logs in half so it's like a folder and I staple the reading log sheets inside.  

I use NICKY's folders on the inside of the binder for my weekly skill sheet.  I use an electronic 3 hole punch on the folders in order to get the holes punched all the way through.  These folders are made of a nice glossy plastic that has 2 pockets inside and has a clear plastic pocket on the front and back.  The weekly skill sheet that I send home each week contains all the skills that we're learning that week, spelling words, and dates to remember.  I change this sheet each year depending on my theme.  Click on the picture to download the Word file of this FREEBIE.
 Inside the Nicky folder, they have 2 plastic pockets...Bring Back and Keep at Home.  This is where my students put their homework and other papers that need to go home.  On the back cover of the Nicky folder is where I put a homework helpers sheet.  This sheet varies each year depending on the needs of my students.  I may put a collection of math and literacy helpers or I may put a differentiated spelling choice sheet.  The back cover of my student binders are reserved for homework calendars.  I like to put all of the homework assignments on a monthly calendar, so each night there's no guessing on what to do.  Parents initial the box each night so I know that the homework was checked by a parent. 


Another Pirate FREEBIE is my Pirate themed sticker book.  I like to use sticker books in my classroom to motivate students to answer questions,  follow our classroom rules, and to do well on their weekly assessments.  First, I print them (in half sheets), cut them out, and paste onto a sheet of construction paper. Then I laminate the whole thing and fold the construction paper in half so it's like a flip book.  

These are the sheets that go on the inside of the sticker book. 

When they earn stickers, they place it on the spot.  They do not have to fill in the Free Space or the Treasure Box space.  When they reach the treasure box, they are rewarded with a trip to our classroom treasure box.    I even put more stickers in the treasure box and believe it or not, they want more stickers for their collection. We only have treasure box days once a week, so those that have reached the treasure box can select something.  I like to initial the treasure box square once they have received their prize.  This helps me keep track of who receives their prizes.


The last pirate FREEBIE that I have for you today: lettered polka dot ships.  You can use these lettered ships on your word wall, on your guided reading wall or book bins, etc. The possibilities are endless.  Be creative!  Click on the picture below to download this file.  The appearance in Google docs makes it look like a plain white ship, if you download the file...you will see the pretty polka dot ships.
I hope you have enjoyed all of these pirate FREEBIES!  I'm sure there will be more to come very soon, so keep checking back!  Enjoy the rest of your Monday...I know I will...The Bachelorette is on tonight!! :-)