Showing posts with label back to school. Show all posts

Wednesday, August 3, 2016

My Data Notebook 2


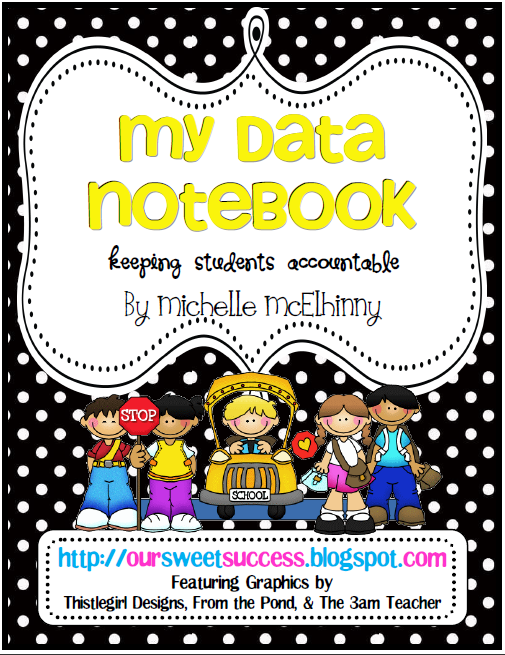
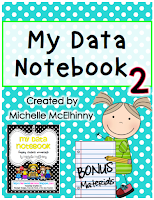
A few years ago I created a data notebook that I've been using in my classroom.  Since then, I have switched schools and several assessments have changed.  I have seen myself revising the pages and wished that I had other pages to record data for other topics.  So this summer, I dedicated my time to creating a new data notebook to compliment my previous data notebook.  Click on the picture below to find it on TPT.
https://www.teacherspayteachers.com/Product/My-Data-Notebook-keeping-students-accountable-with-EDITABLE-TEMPLATES-267830https://www.teacherspayteachers.com/Product/My-Data-Notebook-2-Bonus-Materials-2705876
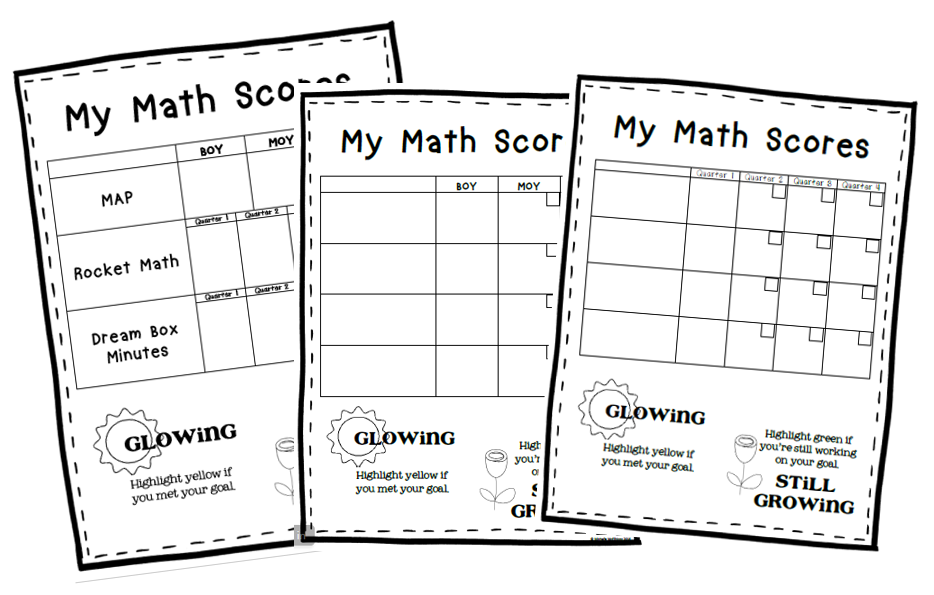
The main purpose of using data notebooks is to increase student achievement. After giving my students their baseline assessments, we begin using the data notebooks to record the results and start setting goals.  There are several choices for recording literacy and math data.  You can choose between beginning/middle/end, quarterly, or every other month.  
 When implementing student data notebooks, it’s important to start with one subject area.  Figure out which subject you want to begin collecting data for and introduce your students to the data collection method.  I like to use the reading level graphs to track student reading levels.  In
there are several options to choose from when graphing reading levels.
 I have also included a reading conference form for you to use during reading conferences.  As your students are reading, look for things that your students are doing well and things that they might need to work on. 
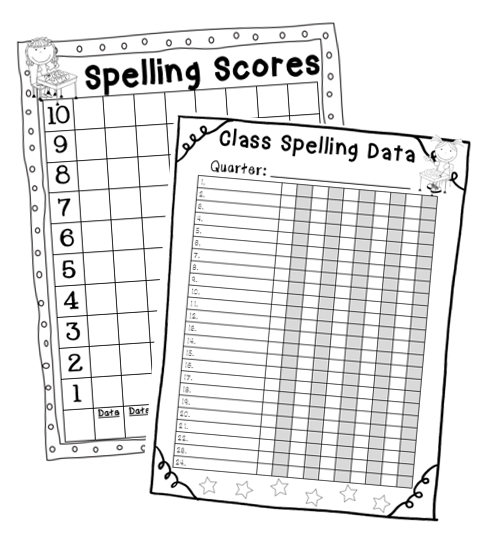
Depending on what program your school uses for spelling, you may be able to use the spelling graphs for different things.  I have used these with regular spelling words assessments and with spelling assessments for words their way.
Students can keep track of the topic they are studying and the scores they received from their pre/post test.  Choose the data from pre assessments, observations, or other resources to see where improvements need to be made.  You can decide how long students need to work toward the goal and when to check in to see if the goal has been met.  After the post test, you will record the results on your form and decide which skills you need to reteach.
Once students begin to gather data, they will record their progress in their data notebooks using graphs or other recording sheets.  Students can reflect on their assessments by writing about which standards they mastered and which ones they still need to work on.  They can create a project to prove they have mastered the standards or they can take a video recording.

Most importantly, when implementing student data notebooks, it’s important to keep everything organized so they can take ownership.  Choose which organization method works best for you (I like binders!).  Introduce your data notebooks, let students color or decorate their front cover, and have them fill in their baseline data.  Start out small!  Don't overwhelm yourself or your will overwhelm your students.  

Have an awesome time implementing data notebooks! 


Tuesday, July 15, 2014

NEW and IMPROVED Data Notebook

I'm very proud to announce a NEW feature added to my #1 best seller "My Data Notebook".  You will now be able to edit the pages in order to personalize them for your individual student needs.  This feature was inspired by a special education teacher who needed space to write her students' goals.  You will love all of the possibilities that come with personalizing this product.  
Download this data notebook for K-2 students, as well as students with specific goals.  

Check it out here:

http://www.teacherspayteachers.com/Product/My-Data-Notebook-keeping-students-accountable-with-EDITABLE-TEMPLATES-267830

Keeping your students accountable just got BETTER!!

Saturday, July 28, 2012

Back to School SALE and Gettin' Crafty

It's hard to believe that some of you have already started your school year!  The rest of us will be joining you in just a few short weeks.  Has anyone had any back to school nightmares yet?  OMG!  I usually get them really bad the entire week before school starts.  I have had dreams that it was open house (orientation) and my classroom was completely bare!!  That's definitely a huge worry of mine!  HA!

To help ease your fears of those back to school nightmares, I have a really awesome Back to School B.O.G.O. sale starting now and running through the end of August.  Click on the picture below to begin shopping! :-)

 When you shop at my Teacher's Notebook store, following your purchase, you get to choose any other item for FREE!!  Now that's a great deal!!!  After your purchase, just send me an email (michelle83mcelhinny@gmail.com) with your FREEBIE selection.  Please be sure to include your Teacher's Notebook user name just in case it's different from your email address. Remember, the free item that you choose must be of equal or lesser value than than the highest priced item of your purchase.  You can make as many purchases as you want in the month of August and you will always get to choose that FREE item!! 


GETTIN' CRAFTY
Well, before I left for vacation I was gettin' a little crafty with this boring directors chair that was sitting in my classroom.  I guess I probably should've been packing but I'm a huge procrastinator.  :-)  Oh well!  Read the rest of this post for a tutorial of how I jazzed up my chair and for how you can get crafty with a chair just like this one.

I use this chair in my classroom for writing celebrations and student sharing.  Students even like to sit in it as a special privilege for silent reading.  You can get a directors chair just like this one at Pier 1.  This is what the chair looked like before I began.   

 The first thing I had to do was pull the boring blue fabric off of the chair.  The fabric on the back of the chair just slides right off when you pull it upwards off of the poles.  The bottom part was a little bit tricky.  Once you take the top part off, the arm rests kinda fall down to the sides.  When the sides are down, it exposes a long piece of wood that is wrapped in the fabric for the seat part of the chair.  I just pulled the fabric up and out towards the middle of the chair and wiggled it until the wood pieces came out.  I removed the wood from the fabric and set them both aside.  

The next step was the fun part!  Spray paint!!   I took the bare wooden chair outside (Gavin and Landen tagged along) and placed it on a piece of cardboard in my driveway.  I kept the arm rest leaned down to the sides so I could get inside the crevices really good.  I sprayed every inch of the wood and the metal pieces with pink spray paint.  (I'm pretty sure you're not supposed to spray paint on metal hinges or screw parts...Oh well...I wanted it all PINK!)  So as I'm spraying, my boys think it's fun to experiment to see if a piece of grass would stick to it if they threw it on my FRESHLY PAINTED CHAIR!!!  Goodness!  Boys will definitely enhance a mother's ability to be patient!  After the chair was completely covered in pink, I just dragged the cardboard and chair into my garage so it could dry over night. 

  I went to a craft store (Hobby Lobby) and got just one yard of polka dot fabric.  When I saw it at the store, I just had to have it!  That was the easy part!  I could probably spend an entire day in this store!!  They just have so many great things that teachers get excited over...like this glitter scrapbook paper!!  Gavin actually spotted it because it was SPARKLING!!  I'm not sure I have a use for this yet, but a super fun must have for the future.  Way to go Gav!
Now on to the hard part...the fabric!  I used a seam ripper to take the stitching out of both pieces of fabric, including all of the edges.  This allowed me to lay the blue fabric completely straight.   Keep in mind the stitch points when the fabric is folded and sewed.  You will need to sew the fabric back together in the exact same spots.

I took the polka dot fabric and wrapped it around the blue fabric so I could get an idea of how much polka dot fabric I needed (it's kinda like wrapping a gift).  You want just enough polka dot fabric on the blue fabric but not too much.  I left about 1/2 inch of polka dot fabric around the edge of the blue fabric.  I put the polka dot fabric on my table face down and placed the blue fabric on top (leaving that 1/2 inch of extra polka dot around the edges).  I took some adhesive spray and sprayed the top of the blue fabric and then I folded the polka dot fabric on top of the blue fabric so the colored part of the polka dots was now on the outside.  You're essentially wrapping the blue fabric with the polka dot fabric, just like you would wrap a gift...only it's a lot thinner.  When you have smoothed the polka dot fabric onto the blue fabric, so there's no bubbles or wrinkles, flip it over.

Next, you'll want to use a regular glue stick on the edges of the blue fabric to get the polka dot fabric to stick to the uncovered blue side.  This will allow you to move things around if necessary without getting too sticky with the spray adhesive.  When the 3 sides are folded down onto the exposed blue fabric, you will then spray this side of the blue fabric and smooth the polka dot fabric from the middle to the edges.  You really don't want the edges of this side to stick just yet.  Once you have the middle smoothed out, spray a little more spray adhesive onto all of the edges and tuck under the fabric edges so the frayed part of the fabric is not exposed.  All of the edges should match up and all of the fabric should be tucked under to create a closed seam.  Set aside and do the same thing to the other piece of blue fabric.

On to the sewing!  After the blue fabric is completely covered with polka dots, you will need to sew around the entire piece of fabric to keep all of the edges tucked under.  Repeat to both pieces of fabric.  Then  you will need to sew the sides back together, just like it was at the beginning.  This is where you want to remember the stitch points where the fabric was folded and sewed.

Once everything is sewed back together, you can now reassemble the chair.  Make sure the paint is dry!  I waited 24 hours.  I cut the extra fabric into strips and tied it in knots around the top of the chair.

Here is the AFTER picture!


Sorry for such an extremely long post, maybe next time I'll try a video!  :-)  I hope this little (it seems harder that it really is) project will inspire you to jazz up your classroom by taking a boring piece of furniture and remodeling it to suit your personality.  A little fabric and a can of spray paint can go a long way to making your classroom visually appealing for your students.  It really was a fun project and it probably only took me a total of 4 hours total to complete this flip.  I look forward to hearing stories of how you get crafty in your classroom.  Leave a comment with your experience. :-)

Monday, July 2, 2012

FACE of a Pirate, Binder Cover, and more Pirate FREEBIES

As you can see, I will be doing a Polka Dot Pirate themed classroom this year.  I have been busy creating all of the things that I will need in the fall.  Here are a few of the items that I have completed so far...there will be more to come, I'm sure!  :-)  Click on any of the pictures to download these FREEBIES.
FACE of a Pirate FREEBIE: This download is modeled after the CAFE literacy menu.  It is 23 page long and contains a FACE of a Pirate menu banner, FACE headers, and FACE strategy cards for you to use when you teach a specific reading skill.
F-Fluency
A-Accuracy
C-Comprehension
E-Expand Vocabulary

This download can be printed and used for an interactive bulletin board for use during guided reading mini lessons and/or silent reading time. Students can select a strategy to work on or you can select it for them. 

FACE of a Pirate is a FREE download that matches the Polka Dot Pirates {Classroom Themed Materials} which you can also download from my store by clicking HERE.

"The Daily 5 and CAFE" are trademark and copy written content of Educational Design, LLC dba The 2 Sisters. Educational Design, LLC dba The 2 Sisters does not authorize or endorse these materials."


 A pirate classroom needs a P.I.R.A.T.E. binder cover.  I have used binders in my classroom for the past six years and it proves to keep my students organized throughout the year.  I actually used Abby Mullins' (Babbling Abby and The Inspired Apple) rock themed binder cover last year and I loved it so much that I created my own pirate themed version that matches the same color scheme.  I like to use address labels on the inside of the covers so students know where to put everything.  Click on the picture to download this FREEBIE.
This FREEBIE is geared toward first grade but can be adjusted if you're planning on using it for a different grade level.  Just email me at michelle83mcelhinny@gmail.com tell me what grade you will be teaching and I will send you the adjusted document.

 On the inner cover, I like to have them store their reading logs for at home reading.  I print these out and glue onto a long sheet of construction paper, then laminate.  Click on the pictures to download these FREEBIES.
I fold the reading logs in half so it's like a folder and I staple the reading log sheets inside.  

I use NICKY's folders on the inside of the binder for my weekly skill sheet.  I use an electronic 3 hole punch on the folders in order to get the holes punched all the way through.  These folders are made of a nice glossy plastic that has 2 pockets inside and has a clear plastic pocket on the front and back.  The weekly skill sheet that I send home each week contains all the skills that we're learning that week, spelling words, and dates to remember.  I change this sheet each year depending on my theme.  Click on the picture to download the Word file of this FREEBIE.
 Inside the Nicky folder, they have 2 plastic pockets...Bring Back and Keep at Home.  This is where my students put their homework and other papers that need to go home.  On the back cover of the Nicky folder is where I put a homework helpers sheet.  This sheet varies each year depending on the needs of my students.  I may put a collection of math and literacy helpers or I may put a differentiated spelling choice sheet.  The back cover of my student binders are reserved for homework calendars.  I like to put all of the homework assignments on a monthly calendar, so each night there's no guessing on what to do.  Parents initial the box each night so I know that the homework was checked by a parent. 


Another Pirate FREEBIE is my Pirate themed sticker book.  I like to use sticker books in my classroom to motivate students to answer questions,  follow our classroom rules, and to do well on their weekly assessments.  First, I print them (in half sheets), cut them out, and paste onto a sheet of construction paper. Then I laminate the whole thing and fold the construction paper in half so it's like a flip book.  

These are the sheets that go on the inside of the sticker book. 

When they earn stickers, they place it on the spot.  They do not have to fill in the Free Space or the Treasure Box space.  When they reach the treasure box, they are rewarded with a trip to our classroom treasure box.    I even put more stickers in the treasure box and believe it or not, they want more stickers for their collection. We only have treasure box days once a week, so those that have reached the treasure box can select something.  I like to initial the treasure box square once they have received their prize.  This helps me keep track of who receives their prizes.


The last pirate FREEBIE that I have for you today: lettered polka dot ships.  You can use these lettered ships on your word wall, on your guided reading wall or book bins, etc. The possibilities are endless.  Be creative!  Click on the picture below to download this file.  The appearance in Google docs makes it look like a plain white ship, if you download the file...you will see the pretty polka dot ships.
I hope you have enjoyed all of these pirate FREEBIES!  I'm sure there will be more to come very soon, so keep checking back!  Enjoy the rest of your Monday...I know I will...The Bachelorette is on tonight!! :-) 

Thursday, June 28, 2012

My Data Notebook

 Okay, I have finally finished the data notebook that I've been working on forever.  I think this document contains the most information that I've ever put into a product.  If you're looking for an all inclusive data notebook to start your year, look no further.  This data notebook has just about everything that you could think of when it comes to academic data recording.  Not only do you get all of the data pages but you get directions on how to use them and some information about how I have had success with each of the academic areas.

My Data Notebook is a 79 page download containing a TON on printables for you to use to create a data notebook for each of your students.  It comes with a student data notebook cover and several different data pages to choose from.  Students will keep their own data by coloring in pictures or bar graphs to show their progress.  Click on any of the pictures below to download this document for your classroom.

Data Notebooks help keep students accountable for their own learning.  They write their own goals and are able to control the pace in which they learn.  Data Notebooks allow students to observe short term goals and it motivates them to reach their long term goals. 

There are six sections to the data notebook and each section contains several subsections for students to track their own data:

Section 1: Mission Statement-students create a class and self mission statement of a learning goal they would like to reach.


Section 2: Reading Goals-students work on increasing their reading level, oral fluency, fry word knowledge, reading stamina, and maze comprehension activities.  Each subsection contains a data sheet to choose from.
 
Section 3: Phonics Goals-students work on upper and lower case letter recognition, letter sounds, phoneme segmentation, and nonsense word fluency.  Each subsection contains a data sheet to choose from.


Section 4: Spelling Goals-students work on word family knowledge as they learn new spelling sound patterns each week, and they keep track of how many words they spell correctly on each spelling test.  The word family section contains all word families that your students will learn throughout the school year and a graph to track how many words they get correct on each spelling test.

 Section 5: Writing Goals-students work on using capital letters, spacing, correct spelling, punctuation, and handwriting in their writing.  They use the writing rubric that is included to make their writing perfect.
 
 Section 6: Math Goals-students work on counting on, counting back, addition and subtraction fluency, and they keep their own assessment data based on the test they take in the classroom (weekly or quarterly)
 
 The nice thing about this data notebook is that you can choose the data pages that you use in your own classroom.  I realize that different schools have different ways of doing things and I wanted to provide enough of a variety in the data pages for you to choose the best method for you and your students. 


If you have any questions or comments, please feel free to email me at michelle83mcelhinny@gmail.com